
Overview
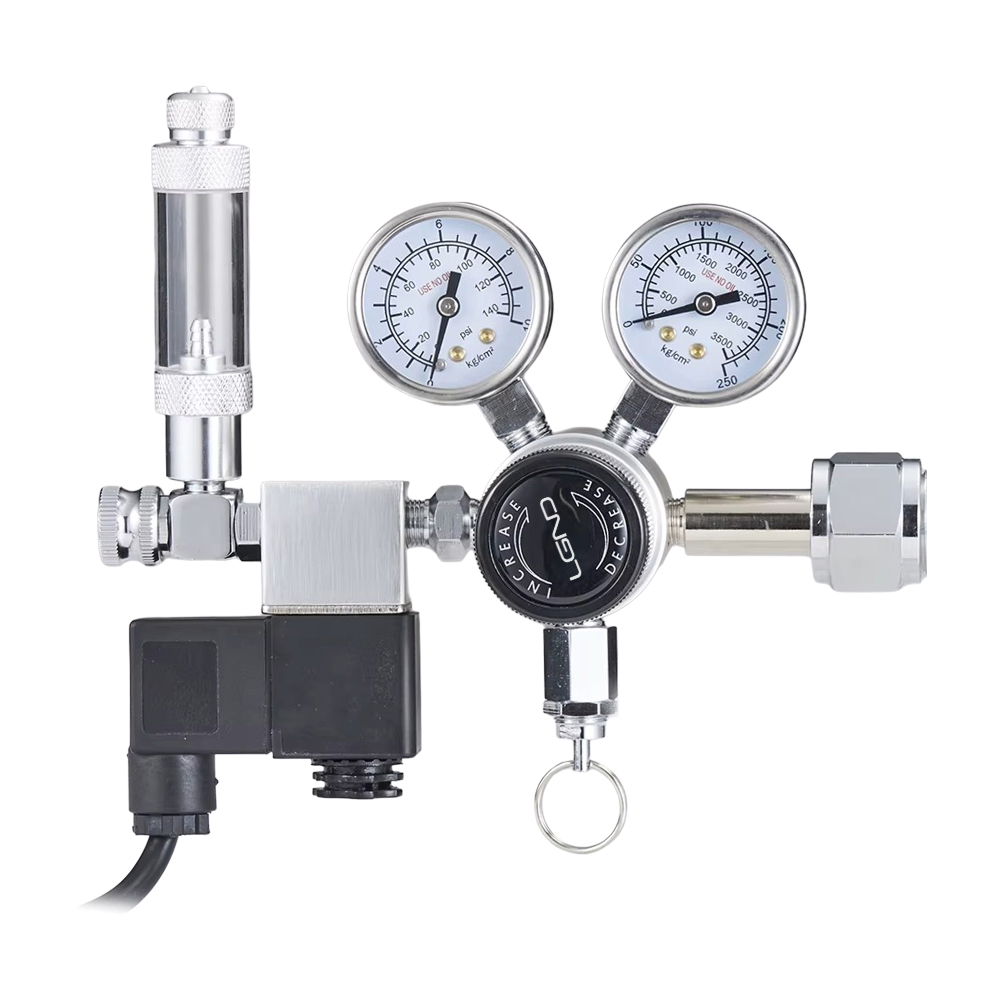
Legend Titan™ Pro CO2 Regulator is a professional dual-gauge pressure regulator engineered to provide precise, stable, and reliable carbon dioxide delivery for planted aquariums and advanced aquascaping systems. Combining precision pressure control, integrated solenoid automation, fine needle valve adjustment, and an external bubble counter, Titan™ Pro allows aquarists to maintain consistent CO2 levels while simplifying daily operation and long-term system management.
Stable carbon dioxide injection is one of the most important factors in achieving healthy aquatic plant growth. Fluctuating CO2 levels can negatively impact plant development and may contribute to algae growth. Titan™ Pro is designed to deliver consistent output pressure and precise bubble rate adjustment, helping maintain optimal conditions throughout the aquarium's photoperiod.
The dual-gauge configuration allows continuous monitoring of both cylinder pressure and working pressure. The high-pressure gauge provides an indication of the remaining gas inside the cylinder, while the low-pressure gauge allows accurate adjustment of regulator output pressure to suit the requirements of different diffusers, atomizers, reactors, and inline systems.
An integrated electric solenoid valve allows automatic control of CO2 injection when connected to a timer or aquarium controller. Constructed from high-quality metal components and precision-machined fittings, Titan™ Pro is designed to provide years of dependable operation under demanding aquarium conditions.
Instructions
Incredible function, design and manufacture — the Ultimate-Pro Dual Stage CO2 Regulator with 12v DC solenoid gives the highest performance possible.
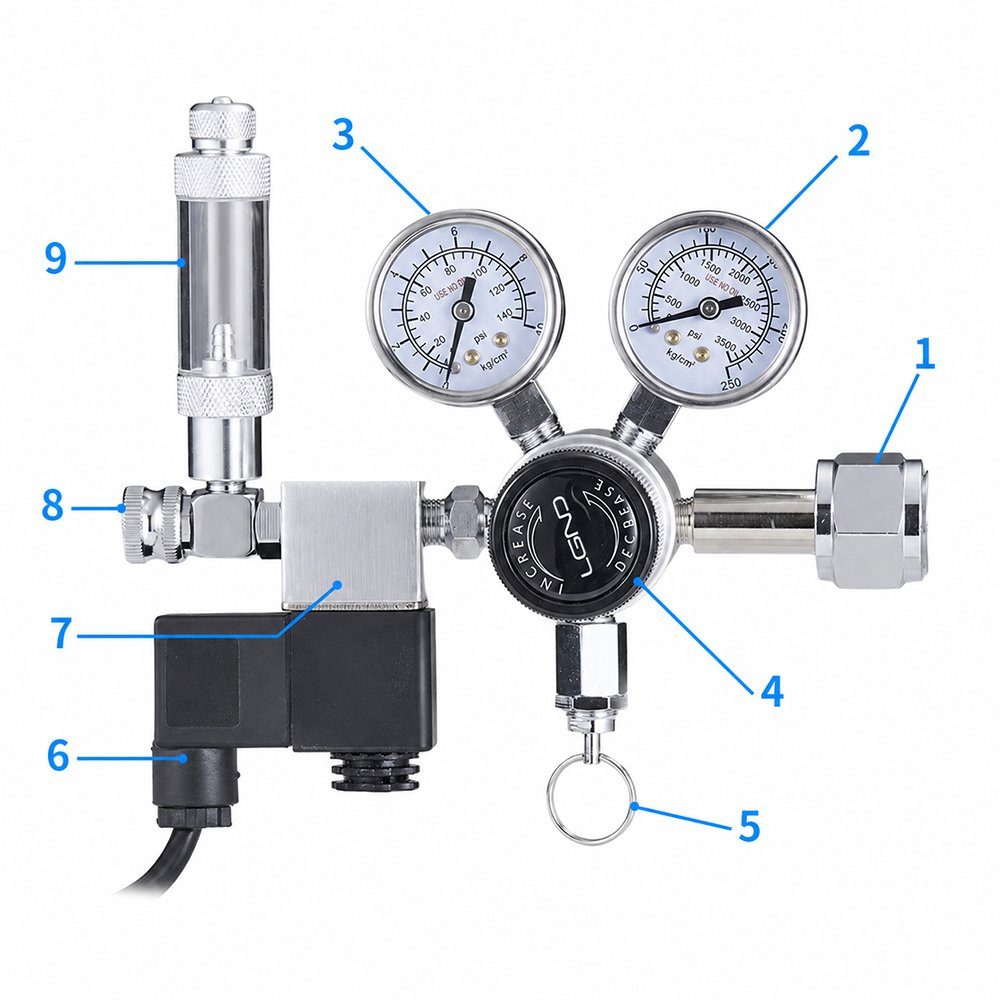
Legend Titan™ Pro CO2 Regulator at a Glance
1 — CO2 cylinder connection nut
2 — High pressure / CO2 cylinder pressure gauge. Displays the amount of CO2 in your cylinder. Pressure will be at 700–900 PSI as CO2 is in liquid state. When the gauge starts to drop, liquid gas has evaporated and you have a few hours to a few days left to change the cylinder.
3 — Low pressure / working pressure gauge
4 — Solenoid valve main block
5 — Bubble counter with integrated check valve
6 — Gas flow (bubble rate) adjustment — high precision integrated needle valve
7 — Low power 12VDC solenoid electric coil
8 — Safety relief valve with easy pull-down relief ring. Pull ring down for a few seconds to release gas from the regulator — useful when dialling working pressure down.
9 — Working pressure adjustment knob
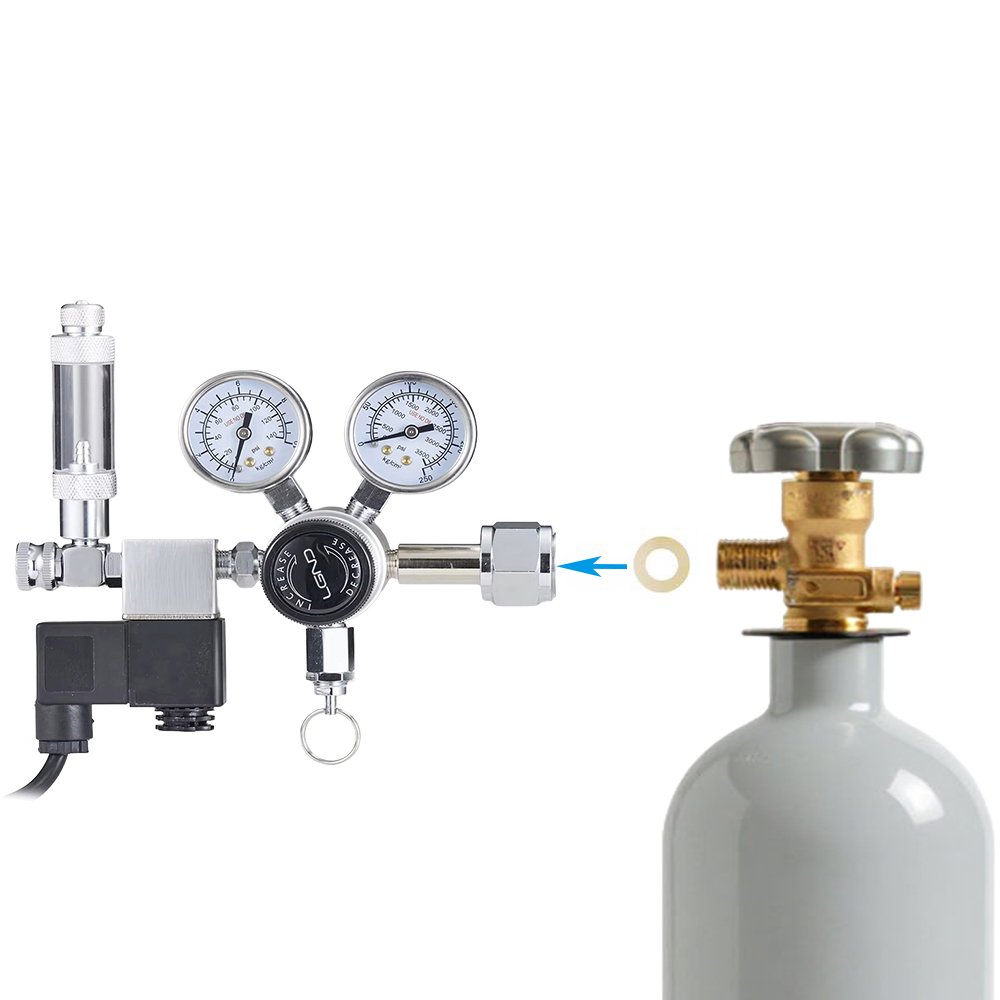
Ensure that a suitable sealing washer is correctly installed before connecting the Legend Titan™ Pro CO2 Regulator.
Inspect the washer for any signs of wear, cracking, flattening, or deformation before installation. A damaged or missing washer will result in gas leakage at the cylinder connection.
Position the washer evenly within the regulator connection recess to ensure a proper gas-tight seal when the regulator is attached to the cylinder.
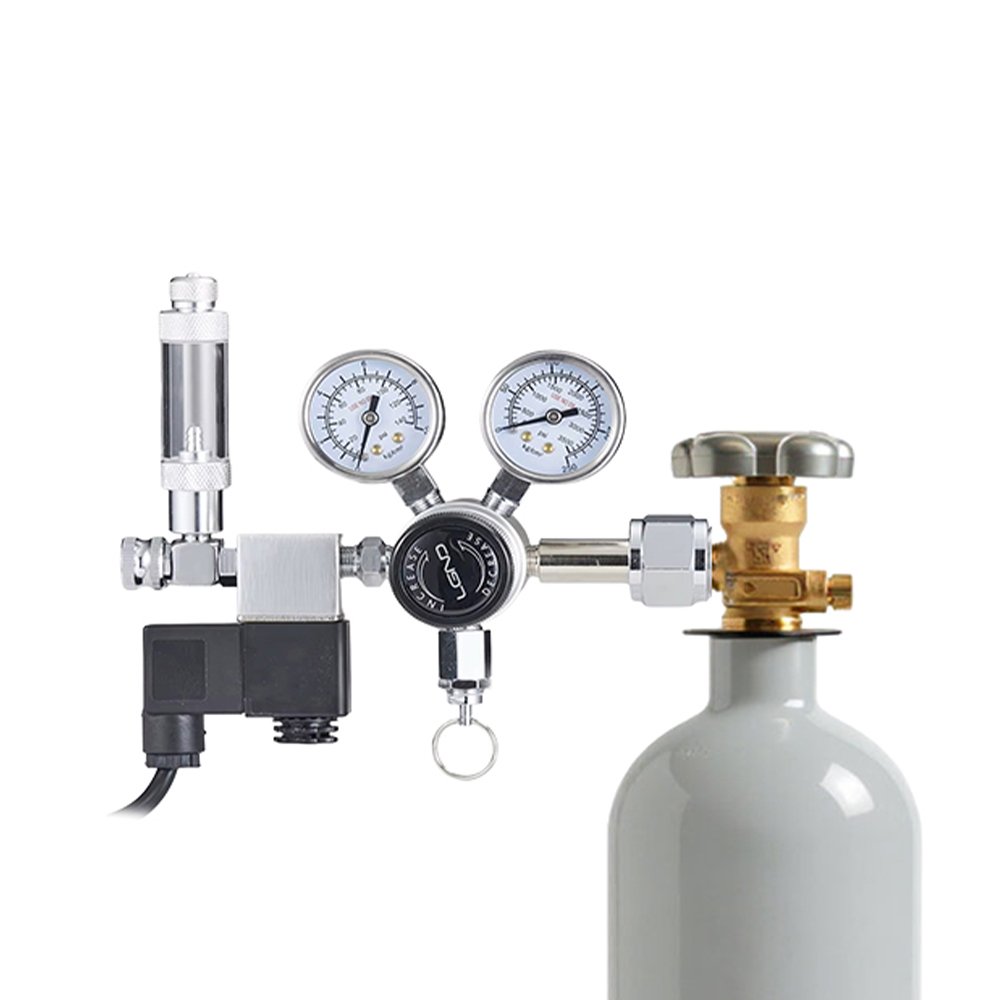
Securely attach the Legend Titan™ Pro CO2 Regulator to the CO2 cylinder using an appropriate spanner or wrench.
Hand-tightening alone is generally insufficient to create a reliable high-pressure seal and may result in gas leakage. Use a suitable tool to ensure the connection is properly secured.
Do not overtighten, as excessive force may damage the sealing washer or connection threads.
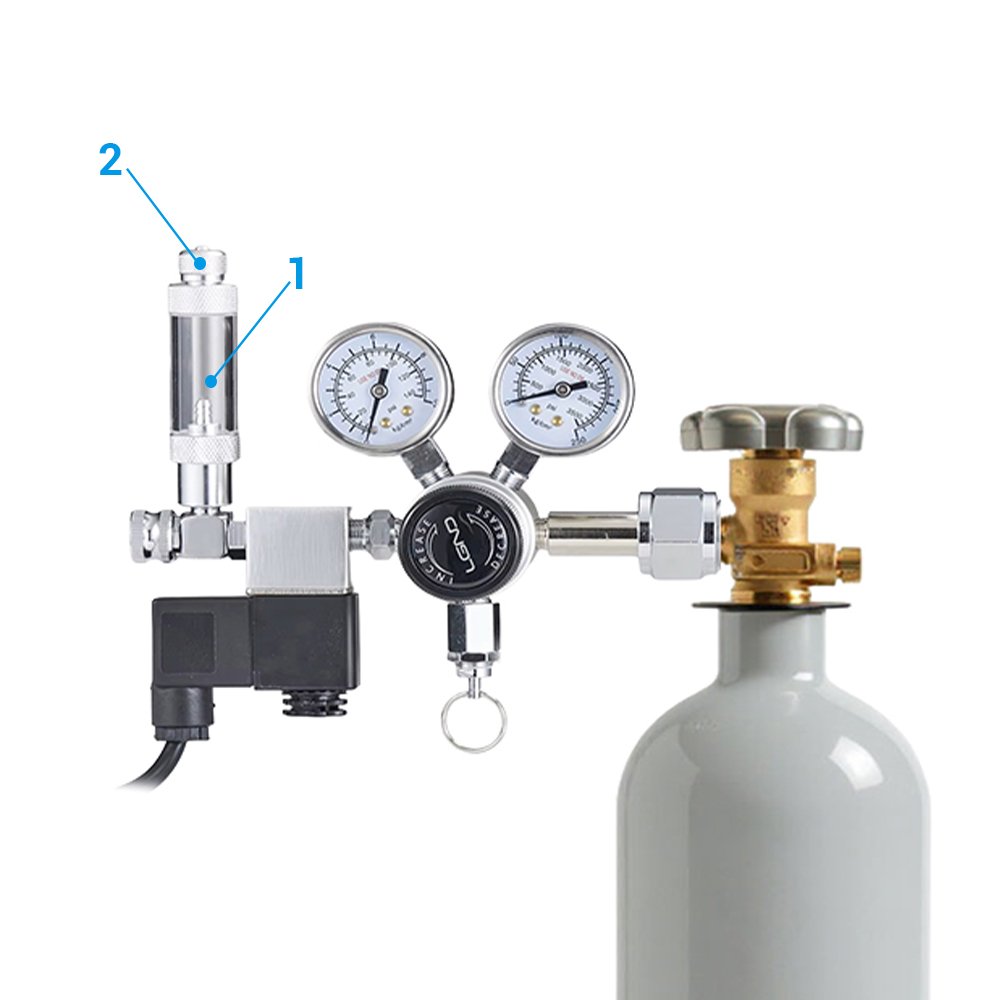
1 — Remove top cap and fill bubble counter with water
2 — Feed tubing through the collar and install cap back onto the bubble counter
Fill the bubble counter with LGND CO2 Bubble Counter Liquid™ or distilled water and connect the LGND CO2 Hose PRO™ to your diffuser, atomizer, or reactor.
Note: *We do not recommend mineral oil as it may contaminate your diffuser.
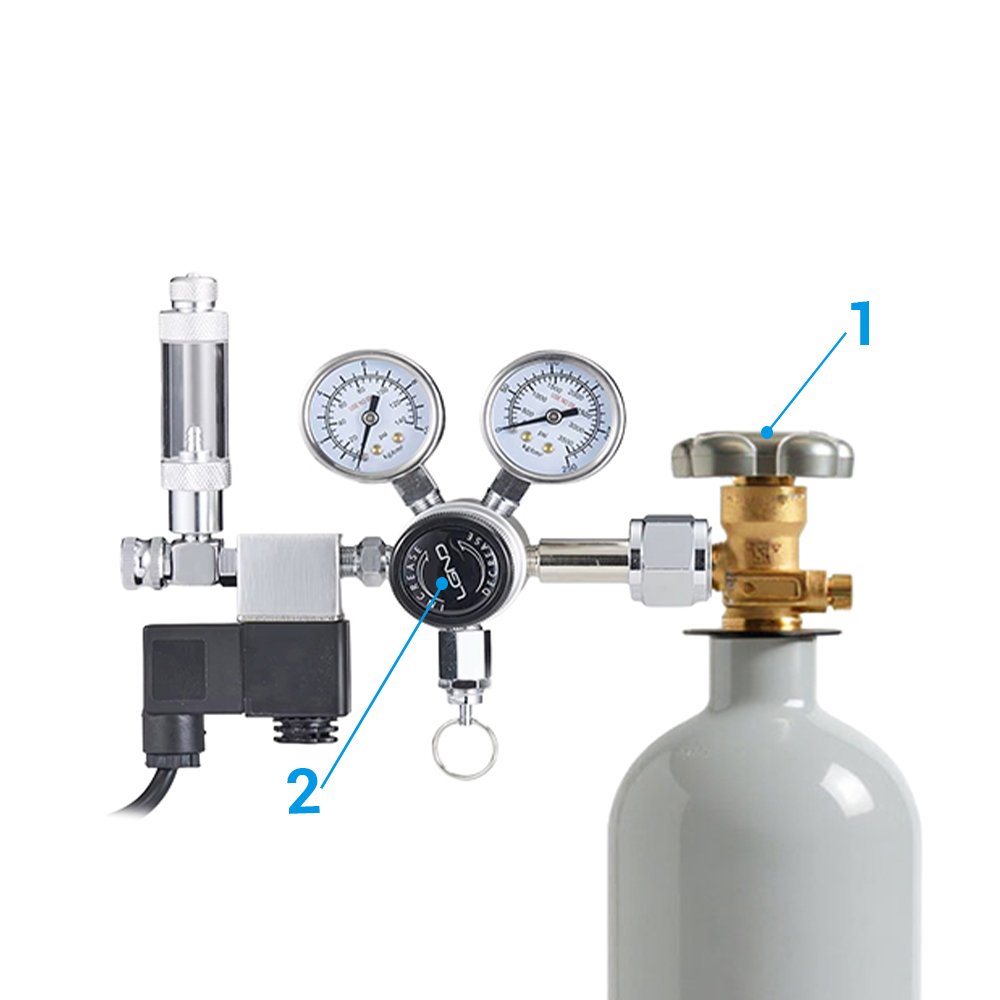
A — Open main CO2 cylinder valve
B — Adjust working pressure to desired level by turning front knob clockwise
Working pressure guidance:
10–20 PSI — Reactors
20–30 PSI — LGND CO2onnect Diffuser or LGND Rhapsody™ CO2 Glass Diffuser
30–40 PSI — LGND Atlas™ or LGND Flux™
40–60 PSI — LGND Atlas™ or LGND Flux™
Before opening the cylinder, fully close the needle valve by turning it clockwise and reduce the working pressure adjustment to its minimum setting by turning the pressure adjustment knob fully anticlockwise.
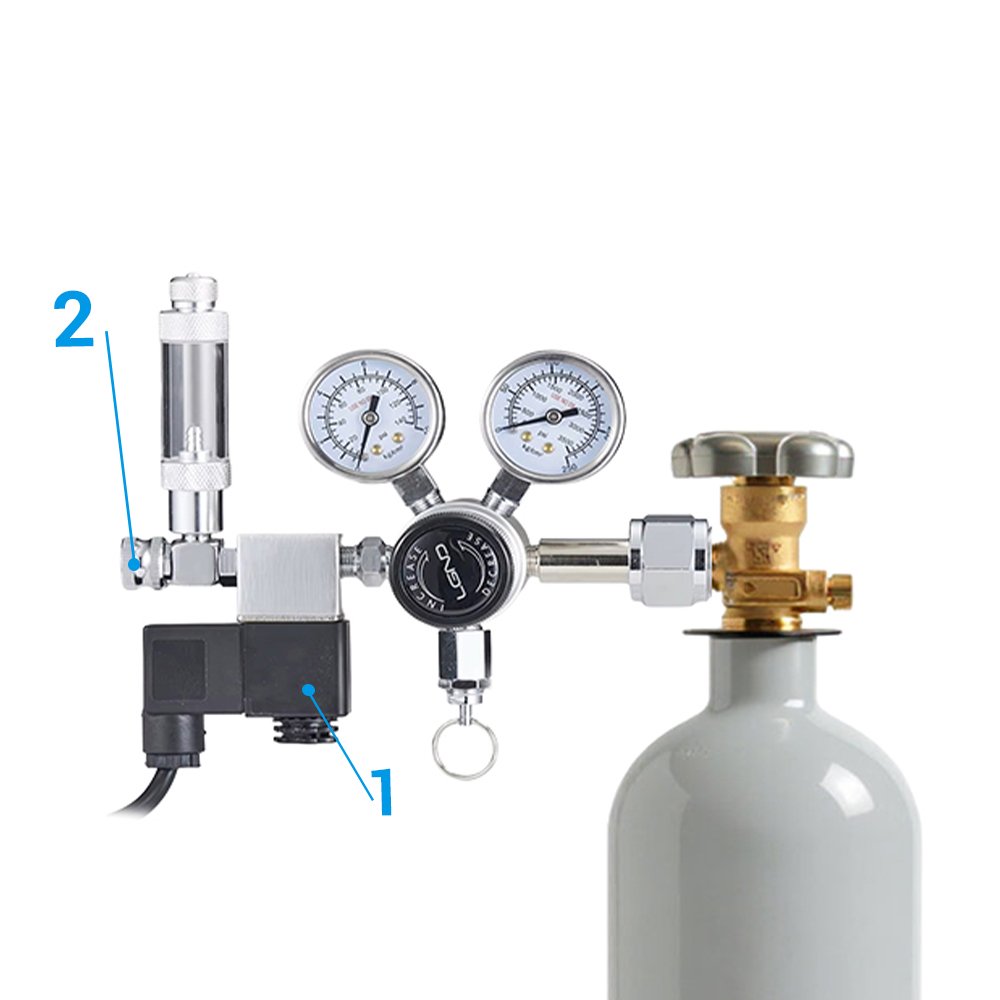
Connect the solenoid valve to a suitable power source and switch it on. Slowly open the CO2 cylinder valve. The high-pressure gauge will display the cylinder pressure, indicating the amount of CO2 remaining within the cylinder.
Gradually increase the working pressure by turning the pressure adjustment knob clockwise until the low-pressure gauge indicates approximately 40 PSI (2.8 bar). Certain inline atomizers or reactors may require higher working pressures.
Slowly open the precision needle valve by turning it anticlockwise until bubbles begin passing through the bubble counter. As a general starting point, approximately 1 bubble per second is suitable for aquariums around 150 litres.
Allow several hours for CO2 levels to stabilize before making further adjustments. For best results, synchronize the solenoid valve with the aquarium lighting period — switching CO2 on approximately one hour before the lights turn on and off approximately one hour before the lights turn off.
Directions
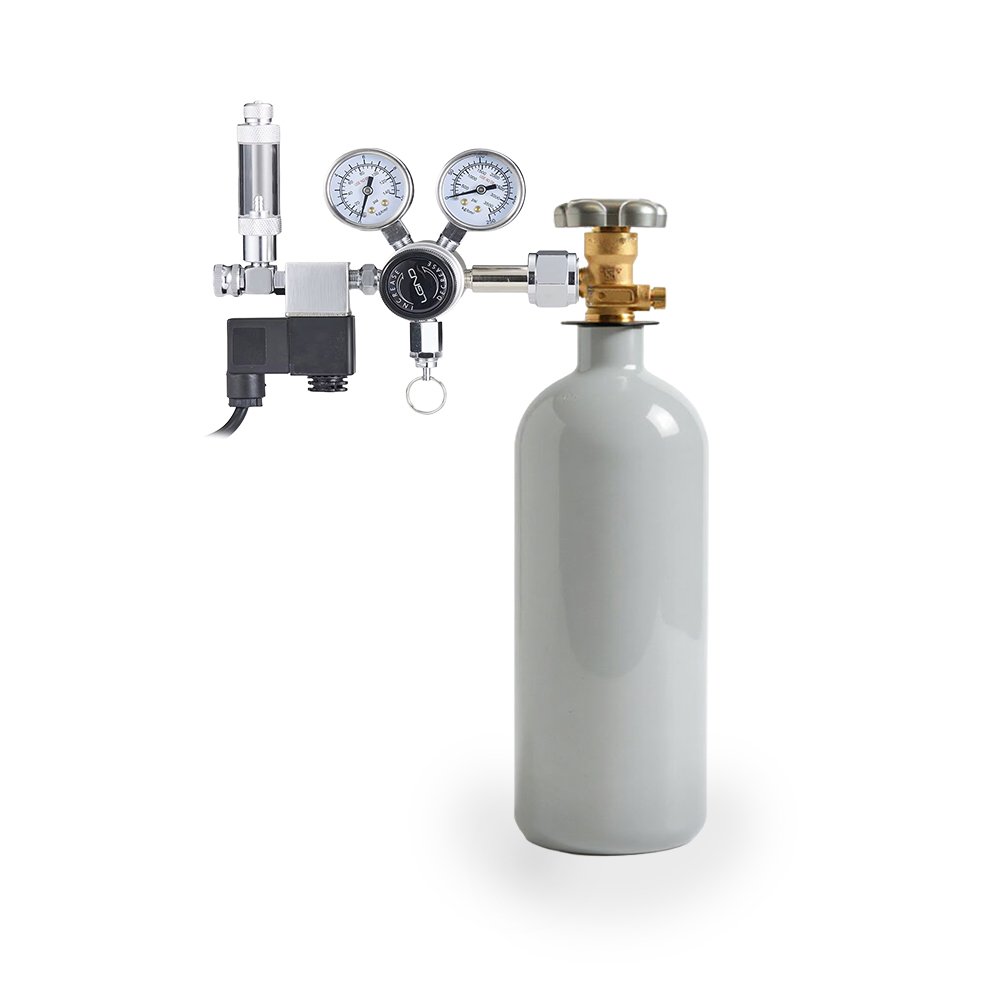
Ensure that the CO2 cylinder valve is fully closed before installation. Attach the regulator securely to a compatible CO2 cylinder and verify that the sealing washer is correctly installed. Tighten the connection according to the cylinder and regulator specifications.
Fill the bubble counter with LGND CO2 Bubble Counter Liquid™ or distilled water and connect the CO2 tubing to the outlet connection. Install a check valve if one is not already integrated into the system.
Slowly open the cylinder valve and observe the high-pressure gauge. Gradually adjust the regulator output pressure using the pressure adjustment knob until the desired working pressure is achieved. Fine-tune the bubble rate using the precision needle valve until the desired CO2 injection rate is established.
If using the integrated solenoid valve, connect the power supply and synchronize operation with the aquarium lighting schedule or controller. CO2 levels should always be increased slowly and verified using a suitable drop checker or CO2 indicator.
Technical Specifications
FAQ
Why does the regulator use two gauges?
One gauge displays cylinder pressure, providing an indication of remaining CO2 within the cylinder. The second gauge displays working pressure, allowing accurate adjustment of regulator output to match the requirements of the connected diffusion equipment.
What is the purpose of the solenoid valve?
The solenoid valve automatically turns CO2 injection on and off. When connected to a timer, CO2 can be synchronized with the aquarium lighting schedule, reducing gas consumption and simplifying operation.
Why is a needle valve important?
The needle valve allows precise control of bubble rate. Fine adjustment is essential for maintaining stable CO2 levels and achieving optimal plant growth.
Can Titan Pro be used with inline atomizers?
Yes. The regulator is suitable for use with diffusers, inline atomizers, reactors, and other aquarium CO2 equipment requiring stable working pressure.
Why does cylinder pressure remain high for a long time?
Compressed CO2 cylinders typically maintain relatively stable pressure until most of the liquid carbon dioxide has been consumed. A noticeable pressure drop often occurs near the end of the cylinder's service life.
Is the regulator suitable for large aquariums?
Yes. The regulator can be used on nano aquariums, medium planted aquariums, and large high-demand aquascaping systems when properly adjusted.
Safety
For aquarium CO2 systems only. Keep out of reach of children. Pressurized carbon dioxide cylinders contain gas under high pressure. Always install and operate the regulator according to the manufacturer's recommendations and applicable safety guidelines.
Before installation, verify that all connections, sealing washers, gauges, valves, and fittings are in good condition. Never use damaged or leaking equipment. Do not expose the regulator to excessive moisture, direct water contact, or corrosive environments. Ensure that electrical components associated with the solenoid valve remain dry at all times.
Always open cylinder valves slowly to prevent sudden pressure surges. Monitor the system carefully following installation and perform leak testing before leaving the system unattended. Excessive CO2 concentrations may cause stress or respiratory difficulties in aquarium livestock. Increase CO2 levels gradually and continuously monitor aquarium inhabitants during adjustment.
Disconnect electrical power before servicing the solenoid valve or performing maintenance on the regulator assembly.